Webopac Preferences – Templates
1. Introduction
You can create a selection of templates for different situations. E.g. for different locations, or searching for different material types.
· Click the button under the All Profiles section on the Start page.
The Templates screen is displayed:

· Select the language that you want to use to define the wording for the Template.
· Select the database that you want to use to define the Template for.
· Style class refers to elements in the style sheet that is used to display the WebOpac.
· Width is defined in percentage of the screen that must be used to display the element (label or data).
Note
This screen is quite long. To see the rest of the options, use the scroll bar at the right hand side of the screen to move up and down the screen page.
1.1. Meta templates
Meta templates can be used to define export formats in case you have multiple databases with different bibliographic formats. In such a case the definition of a general template to be used for exports (see section 4) would not be sufficient. Because what is valid for MARC21 would not be valid for the Vubis Smart format, etc.
When you click on the button the following window will be displayed:

From this screen you can add a new meta template or modify an existing one:

Select a template from the dropdown list for each of your defined formats. The templates shown in the dropdown list are the ones you created and then set to be used for export (see section 4 for an explanation of template selection for specific situations).
2. Elements
The elements relate to the fields of the bibliographic format defined for the chosen database. This definition is made in AFO 151 – Data dictionary for records – Databases. In this example we use the MARC21 format. The Element Name in the example shown below takes all of the subfields for the tag 100.
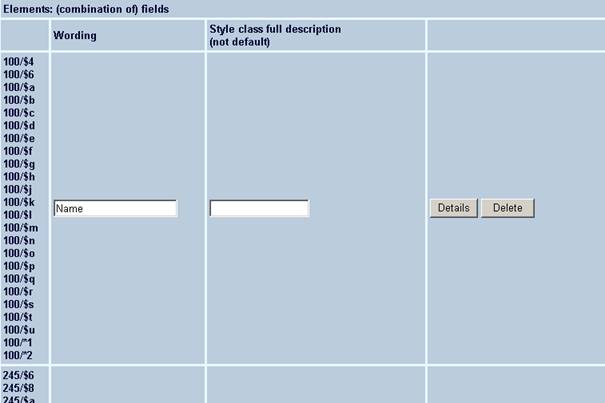
· To add another element, you can select one tag, or a subfield(s) within the tag, or more than one tag or subfields.
- If you select the tag (e.g. 110 – Main entry – Corporate name) the system will add all of the subfields belonging to that tag.

- If you select one subfield (e.g. 110/$a – Corporate name) the system will only add that subfield

- If you hold the Ctrl key down you can select any subfields you want to display (e.g. 110/$a, 110/$c,…)

· Click the button
The Wording new database field dialog box is displayed:
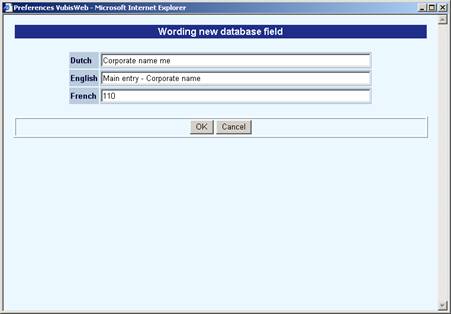
· Enter the wording you want to appear for the element. In the example above, the selection was made for tag 110.
· Click
The new element appears in the list of elements.
· Click the button next to the new element
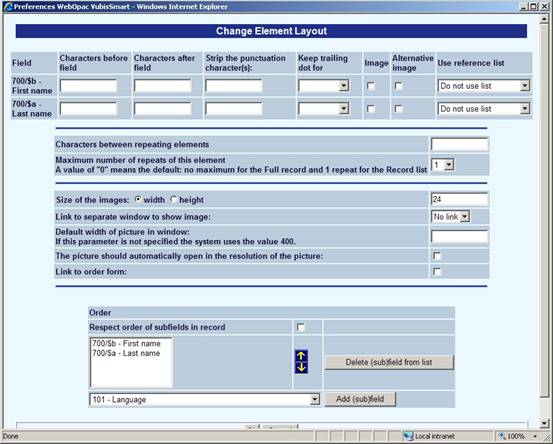
The Change Element Layout dialog box is displayed:

Fields on the screen
Characters before field / after field: For each tag selected, you can specify whether any characters should be inserted before and/or after the data. For instance, some fields require punctuation after certain subfields.
Note
Infor has embedded punctuation for MARC21. You should leave these fields blank and let the system insert the appropriate punctuation.
Strip the punctuation characters: Enter a list of punctuation characters to be stripped from the display if they exist in the data of the subfield.
Example
The data in the physical description or publication date fields may contain a number of different punctuation characters embedded in the data. Examples 10 cm.: or 10cm/ etc. To display consistently, one may want to strip any punctuation characters from the data string, then use the prefix / suffix options on this subfield to create a consistent display.
Keep trailing dor for: It is valid to keep the dots or periods for certain abbreviations. A list of terms for which to keep any trailing periods or dots is defined in AFO151 - Formats (Format) - Element / Group profiles - Display element layouts - Words with trailing dot. This list can be applied to the data element for the WebOpac display.
Example for Publisher Names could contain the following terms as abbreviations:

Display prefix before surname: When there is a comma in the data string, this option will flip the display of the data so that the string after the comma appears before the first part of the data in the subfield. Most common use is in the author field of a smart record, where the data for the author is stored as follows:
Author [pri.] Authority Auth:4:772
Last name Wildt, van der
First name Werner
Where the prefix
of the surname is after the comma in the surname field. When the check box is ON, the result is:
|
Author with prefix |
When the checkbox is OFF the result is
|
Author without prefix |
Use reference list: Reference lists can be created, where an incoming string from the data can be linked to images or texts for the display. See section 4 for details.
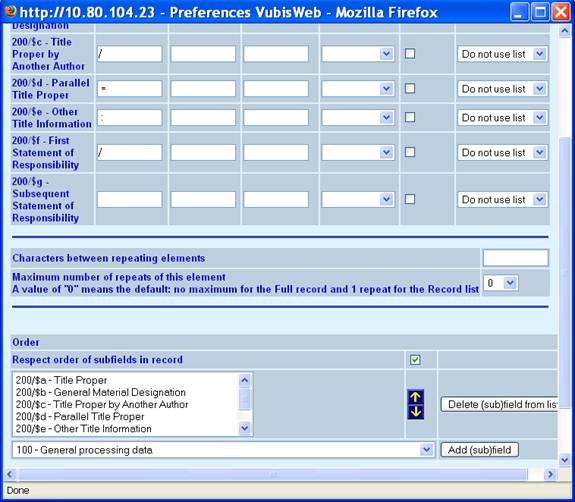
Characters between repeating elements: When elements are repeating (multiple tags within a record) tou can define here how to separate the tags for data display order. You can define a character, HTML code or both.
Respect order of subfields in record: You can specify the order in which subfields display. In MARC21, subfields may not necessarily display in ‘alphabetical' order. Check this box if you want the order of the subfields within the bibliographic record to be retained.
If the tag in the record is stored as $a1 $c1 $t1 $a2 $t2 $a3 $t3
If the option is NOT checked, then we display $a1 $a2 $a3 $c $t1 $t2
If the option IS checked, we display $a1 $c1 $t1 $a2 $t2 $a3 $t3
Example
Bibliographic data:
200 1# $a Le ¶roi et le bouffon ou the king and the misérable monkey
$e Études sur le théâtre de Hugo de 1830
1839
$f Anne Ubersfeld
200 1# $a Birmanie =
$d images du bouddhisme vivant ;
$a Burma =
$d images of living buddism
$a Burmese =
$d More Images of life
The WebOpac template details for this field:
then the result is:
Title: Le roi et le bouffon ou the king and the misérable monkey : Études sur le théâtre de Hugo de 1830 1839 / Anne Ubersfeld
Birmanie = = images du bouddhisme vivant ;
Burma = = images of living buddism
Burmese = = More Images of life
If the option to respect the order within the MARC record is NOT set:

The result is the following where in the second tag all $a are grouped and display, followed by the $d (not respecting the order in the MARC record).
Title: Le roi et le bouffon ou the king and the misérable monkey : Études sur le théâtre de Hugo de 1830 1839 / Anne Ubersfeld
Birmanie =Burma = Burmese = = images du bouddhisme vivant ;
= images of living buddism
= More Images of life
You can also specify whether the field contains a hyperlink or an image.
Click
It is possible to define ‘image' elements which should be shown on the full record display in the WebOpac. When the end-user clicks on the (small) image shown on the full record display the system shows a popup screen with a larger version of that image. It is possible to define –per element- a different width of the popup image.
When you have specified the field contains an image (click on the ), the input form will look like this:
Note
The option "Link to order"form is not supported.
When the data element is defined as a hyperlink (click on ) then the input form looks like this:

Apart from bibliographic information, the following additional elements can be defined:
· Material type
· Sublocation
· Location
· Availability
· Record number
· Covers and Contents
Note
Please note the defintion of information related to the display of book covers and/or content summaries with either search result list, full record or both requires a subscription with the supplier of the cover and contents information.
See the release notes of 3.0 & 3.5 for more information on supported suppliers and associated functionality.
Contact Infor for more information on how to set this up.
2.1 Order of elements
When you have completed the configuration for all the tags you want to display in the Web OPAC, you must remember to select them to display for the Full Record, the Review screen and for the Record List.
·
To add an element to display in the Full Record description, select it from the left-hand Available options box of the Order of elements by full description.

·
Click the right arrow ![]() to add it to the list of Chosen options
to add it to the list of Chosen options
· Use the up and down arrows to determine the order you want the elements to display
Perform the same actions for the display on the Review screen.
Select the order in which Relations must be shown:

When displaying the related records on a full record display screen, the system can display the related records in either ascending or descending order. This feature allows you to start the display with the most recently created relations.
If the option " Strip volume wording before sorting" is activated the volume wordings are stripped from the volume data of the related works before they are sorted and displayed with the full record.
Then select the data that must be shown for each element. This is derived from the definition in AFO 151 – Data dictionary for records – Formats.
If you do not define a value for a specific relation type, the system will use the default value. If you do not define the default value, the system will select the !Title element (as defined in AFO 151), which typically will display the title only.
Note
There is a known problem with “group” profiles (such as !ISBD) as opposed to “element” profiles, such as “!Title”. A display defined with a group profile will show nothing. Therefore you should not use “group” type elements in relationship display. Also be aware that a relation to another record will not display if there is no data for the display element. You should always include a mandatory field such as "title" in the display element.

The elements that actually display in the Record List are determined by the configuration for each “Profile” – Texts – Names above columns in record lists.
You can determine here all the possible fields that you might wish to display, then chose which ones are to display for each individual profile.

You can also determine the elements that actually display in the Reading Lists, see the help on Reading Lists for more information about this feature.
3. Special use of templates
Use WebOpac template in AFO 111
The configuration in the template can be used to define the display in AFO 111.
![]()
Once you have configured the default template, you can add more templates that vary from the default.
You can make a new template from scratch by clicking the button.
Or you can add a new template by copying the default one with the button and then making any necessary amendments.
The method you use is determined by how different the new template is from the Default one. If there are only minor changes then it is quicker to make a copy. If it is very different, then it is probably quicker to make a new one.
Selection of templates for different situations
You can specify which template must be used in which situation:

· Under Circumstances, choose a profile.
· Optionally choose a database, a location and/or material type.
· Then choose the template that must be applied in that situation.
· Click on the button.
The new “Situation” will be displayed in the list below the options. From there you can use the button, to delete it if necessary.
Note
Apart from the option to generally specify different templates for different profiles, you can use this to determine which template must be used to email saved items. That is the profile that is used to email the bibliographic details of a search result to the user when he/she chooses the option to send saved items from the WebOpac. See also section 1.1 on meta templates.
4. Reference lists
Reference lists can be used to show icons and/or texts instead of codes in record lists or the full description, e.g. for material type or genre. The system has facililties for displaying graphics instead of text. Although it was possible in the past to display graphics instead of text (by putting HTML code in the text, e.g. “<IMG SRC=FileName>”), there are more sophisticated ways to manage this via the Preferences.
After one or more reference lists are defined they can be used with every (sub)field.
The effect of this can be seen in the next screen shot, which displays both the language and the availability not as text, but with a graphic.

· Click the button on the Templates page.
The Reference list screen is displayed:

· Click on the button.
The New list screen is displayed:
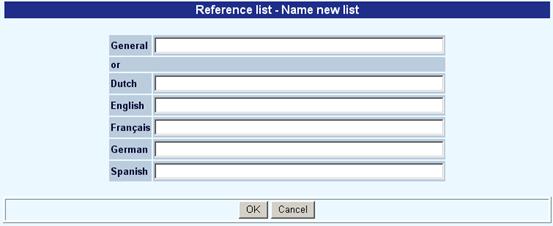
· Enter a general heading OR a heading for each language.
· Click to save your changes.
The next screen shots shows the most important properties for such a reference list (the example in the screen shot is for a list of language codes).
The Base URL contains the source for the images. The icon name is basically appended to this URL for the display
The Default reference can be used as a catchall when there is nothing else available to display.
The Codes are the wording that come in (language specific).
Notes
You can define icons to be displayed in record lists and/or full record display. If you wanted to have an icon in one and not the other, then you would define separate data elements (one with icons and ones without).
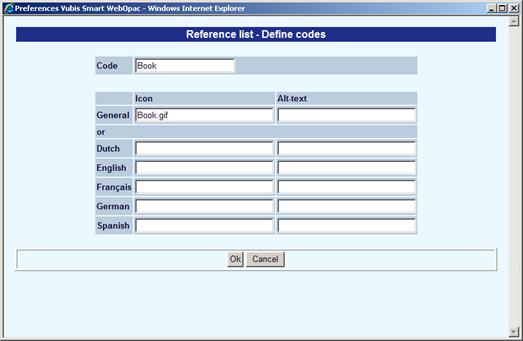
When you add a new reference or click the button for an existing reference, another input form will be displayed.
The code in the reference list must match either code for material type; OR wording in material designation (in which case you need lists per language). In the example below the code "CD" is used.

The icon name in the code must match the actual file name in the directory where the images are stored.

Below is an example of a combined definition, using the wording for the material designation (which means separate listst have to be made for each language, rather than adding descriptions in each language for the one code):
Note
The icon reference lists may need to be added to both the authority templates as well as the bibliographic (if you are trying to display icons / reference lists on the authority record display as well).